Showing posts with label techniques. Show all posts

Saturday, October 17, 2009

What I'm doing this weekend instead of going to Rhinebeck

Eating brussels sprouts.

(Isn't this thing cool? I got it at the farmer's market today. Who knew that they grew like this? It's heavy, too -- like a big caveman-club of healthiness.)

Knitting cashmere spiral mitts and listening to NPR.

Grading papers.

Reading for orals.

I'm sure that Rhinebeck will be more fun, but I just can't stomach it with both the work pileup and the upcoming move -- don't need more stash to pack!

Want another shot of those mitts? I thought so.


They're ribbed for her pleasure! I laboriously un-plied the double strand of 1/14 I had used for the spiral cowl (which I had originally twisted like that by colourmart), so these are exactly half the scale of the cowl. I love them! It was my first crack at top-down mittens -- I like it, and it does let you modify to fit the amount of yarn you have, but I'm not a huge fan of the thumb join part. These guys are so warm! Just trying them on for size or to snap a photo made my hands feel so warm and cuddly. I think they're going to get a lot of use.

NB: I cast on 56 stitches to make these, following the 8-stitch repeat of the spiral cowl's eyelet pattern after a picot edge. I added a 30-stitch-around thumb tube after 4 repeats, then decreased the thumb gore every other round until it was gone, then worked 5 more repeats of the spiral and cast off with a picot edge. I also tried picking up stitches and working a 3-needle BO instead of sewing down the final hem -- kind of a cool idea, and definitely a lot neater, but less stretchy, despite the fact that I used a needle 4 sizes larger for the bindoff.

Monday, August 31, 2009

At long last... Steps to Stranded!

Special note: from now until 2/14/10, I will donate 50% of the proceeds from all my pattern sales to the American Red Cross for Haiti relief efforts.

Cardigan A ($1.99): buy now

Cardigan B ($2.99): buy now

Cardigan C ($2.99): buy now

Or the packet of all three ($5.99): buy now


I'm pleased finally to present a pattern I'm really excited about: Steps to Stranded Baby Cardigans!


This package of three top-down baby cardigan patterns is intended for all ranges of knitters, from beginners who only know knit and purl to intermediate or advanced knitters who have been wanting to try stranded knitting but are a little afraid to try.


Cardigan A has a circular yoke worked in contrasting self-striping yarn for a big effect with very little effort. Cardigan B uses Barbara Walker's "mosaic knitting" to achieve a two-color yoke while only working with one yarn at a time. And Cardigan C... is the one I'm really stoked about: it uses a modified mosaic technique worked over one row at a time to achieve what looks like fair isle... but without ever having to use more than one yarn at a time, and without steeking!

Cardigan A

Cardigan B

Cardigan C

The 16-page pattern includes detailed, illustrated instructions for every technique included in the pattern except knitting and purling, as well as lots of other photos, hints, and charts to make everything totally clear. It's written for thee sizes, from 3 months to 12 months.

Best of all, these three sweaters use up extra sock yarn and are also the same gauge and measurements as my Sock Yarn Stranded Sweater, so you can graduate from these to that! And in fact, the Sock Yarn Stranded fair isle yoke never has more than 3 stitches at a time of one color, so you could use the same modified mosaic technique from Cardigan C to knit it!

There are two ways to buy: you can buy the individual sweater patterns, or you can buy the packet of three patterns at a discount ($1.98 less than buying all three individually).

Cardigan A ($1.99): buy now

Cardigan B ($2.99): buy now

Cardigan C ($2.99): buy now

Or the packet of all three ($5.99): buy now

Finito!


Phew, that was a lot of knitting for no particular recipient!


The second and third of my trio of circular-yoke baby sweaters are finally finished, and I'll be posting the pattern pronto! But first, a moment for boasting.


I am so excited about the technique I hit upon for working the yoke of this seemingly "fair isle" sweater. It achieves quite complicated, one-row color changes (whereas mosaic knitting requires pairs of two rows each), but without ever having to knit with two colors at once!

I am sure I am not the first person to have thought of this, but I did some poking around the internet and couldn't find any other examples. It's so simple, and yet so cool! If you're wondering how it works, check out the Purl Bee's Treeline Cardigan, which exploits the fact that circular needles have two working ends all the time to achieve one-row stripes in flat knitting. That's what got me thinking about how one could work one-row fair isle patterns, slipping stitches as if to work mosaic knitting, but instead of turning the work and purling back and slipping the same stitches, pushing the work to the right and knitting over the same row with the second color! It only works for patterns that have no more than three stitches in a row of one color, but it's an awesome trick! Now I want to use it as often as I can.

Anyway, be on the lookout for the pattern later this afternoon. Yay!

Actually, first a question, though: I am bundling them and selling them as one unit, with a price significantly cheaper than if I sold each individually. But would you want them also sold individually?

Thursday, August 6, 2009

A lot of circles


Finally got a chance to photograph a few of the projects in the works. Everything on the needles at the moment is circular! I've got now two baby yoke sweaters in the works and one finished:


I'm quite pleased with how this one came out, though there's some noticeable difference in the dye lots of the two skeins of "Grasshopper" -- most noticeably where the button band meets the collar.

Then there's a really simple garter yoke cardigan, using some leftover Knitpicks Felici self-striping yarn and Knitpicks "Bare":


And then there's the one that caused me the most consternation: a "fair-isle" yoke sweater using a super-secret trick to make it look much more complicated than it is to knit (which is why it's "fair isle" instead of fair isle). I had to rip and redo this yoke a number of times until I was satisfied with the way it looked.


And even when I was satisfied, I went back in and duplicate-stitched one row with the MC yarn (Knitpicks Stroll in "Tidepool Heather") because I was afraid there wasn't enough similarity between the yoke section and the body section (which is the old standby Knitpicks Essential/Stroll Kettle in "Grasshopper" and Lorna's Laces in "Gold Hill" -- the same two colors, in other words, that I used in the mosaic yoke cardigan pictured above). That combo looks quite different in single-row stranding rather than mosaic knitting, huh?


But it looks quite nice now! I'm busily knitting these as I write up the patterns, hoping to publish all three in one packet (they all have the same gauge and measurements). It's my hope that knitters could work from the garter-yoke one through to the "fair isle" one, gradually becoming more comfortable with stranded knitting. Then they could graduate to my Sock Yarn Stranded (which also has the same gauge and measurements) or to any other fair isle pattern! I'm a little frantic to get the pattern finished by the time Sock Summit is over, because even though I'm not going to Sock Summit, I figured that people would come home loaded up with beautiful sock yarn and be looking for projects to knit with it!

Then lastly, to continue the stranded knitting fiesta, there's one of these:


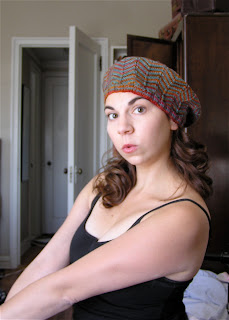
Which I am sure you all recognize as a Selbu Modern in the works, using a popular color combination. It took me a while to hit on the right color of blue, and I'm still not satisfied with it -- I was looking for "Tiffany Blue" or robin's-egg blue, but this is a little greener than either of those colors. I was inspired by haveyouanywool's version on Ravelry. She used Louet Gems fingering, but that was a little out of my price range and I don't like working with it -- too heavy and not springy enough for my taste. This is Knitpicks Essential/Stroll in "Glacial," a discontinued color, and the red is Valley Yarns Huntington (color 4150). I think in combination the two yarns look better than separately, and the Glacial looks sufficiently Tiffany-esque to cut it. Last year I had so much fun knitting and then wearing my Chevron Beret that I figured another pretty beret was just the ticket for getting ready for hat season!

Saturday, June 20, 2009

tutorial: picking up stitches

The body of the new baby sweater is finished, and I'm picking up stitches along the fronts for the button bands. I thought I'd stop and take some pictures and do a little tutorial for any of you readers who have never picked up stitches for button bands (or other things, for that matter) before. You can click on any of these pictures to see a much larger image.

If you look carefully at your cardigan fronts, you'll see that between each column of stitches is a little ladder of yarn that makes a column of little holes. The column of holes you want to work with is the one between the very first column of stitches of your cardigan front and the column of stitches next to it.


Hold your work so that the right side is facing up and the button band is closest to your chest (your columns of stitches will be running sideways). Tie your working yarn to the back side of the work at the very right edge of the front. Poke the tip of your needle into the first hole (the one farthest to the right) in the column you were just looking at, from the front side into the back side. In the photo below, I've already picked up some stitches, but the process is exactly the same:


Here is what it looks like from the back side of the work:


Wrap your working yarn around your needle the way you would wrap the yarn if you were making a stitch.


Pull the loop of yarn you just wrapped around the needle from the back side into the front side of the work.


As you are picking up stitches, you are going to need to skip a hole every once in a while, because rows are shorter than stitches are wide. (Recall that gauge is sometimes given for stitches and rows, and it will say things like "5 stitches and 7 rows = 1 inch.") In this case, I need to skip every fourth hole.


When you get to the end of your cardigan front, you will have a whole bunch of loops of yarn on your needle, ready to turn and work just like regular knitting!

Monday, March 2, 2009

Tulip Yoke Baby Cardigan pattern


Just in time for in-like-a-lion March weather, here's a free baby cardigan pattern with spring colors of mud and grass and a line of cheerful spring tulips!

This is a top-down, circular yoke cardigan in three sizes (3-6, 6-9, and 9-12 months), with instructions on how to increase for the yoke, separate for the sleeves, and pick up stitches for button bands. It's a great pattern to try if you are a first-time sweater knitter!

Also avaliable as a free Ravelry download here.
Matching hat available here.

Note: There was one row missing from the yoke instructions. All increases should be worked in knit rows. Pattern has been amended 7/3/09.

Tulip Yoke Baby Cardigan Pattern

Sizes: 3-6 (6-9, 9-12) months. Shown in smallest size.
Finished Measurements: 20” (21”, 22”) chest circumference

Gauge: 6 stitches and 8 rows = 1” in stockinette

Requirements:
Circular or straight needles, size 3
Double-pointed needles, size 3 (optional)
Sport weight yarn (I used Knitpicks Shine Sport): MC (300-450 yards), secondary colors A (less than 100 yards), B, and C (less than 50 yards each)
Two stitch holders or pieces of scrap yarn
Tapestry needle for weaving in ends
6-8 matching buttons

MC=green (I used “leapfrog”)
A=brown (I used “fedora”)
B=pink (I used “terracotta”)
C=tan (I used “willow”)


Note: this is a top-down circular yoke sweater; it begins at the neck ribbing. It does make use of flat fair isle knitting for a brief section of the sweater (14 rows total), so be warned if flat fair isle knitting is something you hate!

Special instructions:

Complete abbreviations glossary at end of this document.

m1 (make 1): my favorite way to make a stitch is to lift up and knit the right leg of the stitch one row below the stitch on the left needle. Another option is to pick up the bar between stitches and knit it through the back loop.

Reading the charts: pattern repeat is marked in red. For the tulip chart, one or two extra stitches are included next to left and right button bands to make the pattern symmetrical. The tulips are upside-down because the knitting will be done top-down. The fair isle pattern for both charts begins with a purl row.


Directions:

Yoke
With MC, cast on 79 (79, 85) stitches. Work 7 rows of k1, p1 ribbing. Work one row purl. Switch to A and work two rows stockinette. In next row, increase 16 (16, 20) stitches evenly across row as follows: k2 (2, 4), *m1, k5 (5, 4), rep. from * 14 (14, 18) times, m1, k2 (2, 5). 95 (95, 105) st. Work 1 more row stockinette. In next row, increase 28 (28, 28) stitches evenly across row as follows: k7(7,12), *m1, k3, rep. from * 26 (26, 26) times, m1, k7 (7, 12). 123 (123, 133) st.


In next row (WS), join B and begin working tulip chart. You will work 12 (12, 13) repeats of the tulips. Remember to work the extra stitch or two at the beginning of first repeat and end of last repeat to center the design on yoke. After row 10 of the tulip chart, work one row in color A, then in the next row increase 28 (28, 28) stitches evenly across row as follows: k8 (8, 13), *m1, k4, rep from * 26 (26, 26) times, m1, k7 (7, 12). 151 (151, 161) st. Work 3 rows stockinette (in color A). In next row, increase 17 (17, 19) stitches evenly across row as follows: k3 (3, 4), *m1, k9, rep. from * 15 (15, 17) times, m1, k4 (4, 4). 168 (168, 180) st.

In next row (WS), join C and begin working zigzag chart. You will work 42 (42, 45) repeats of the zigzags. After row 4, work one row stockinette in MC, placing markers as follows: p24 (24, 26), place marker (pm), p36 (36, 38), pm, p48 (48, 52), pm, p36 (36, 38), pm, p24 (24, 26).

In next row and following 5 (7, 7) RS rows, work raglan increases: *k to marker, m1, slip marker, m1, rep. from *, k to end. 216 (232, 244) st.

Body
In next RS row, divide for sleeves as follows: knit to first marker, place stitches between first and second markers on a holder or piece of scrap yarn, knit to third marker, place stitches between third and fourth markers on a holder or piece of scrap yarn, knit to end. You can drop the markers in this row. Continue body in stockinette until it measures 9½ (10½, 11½) inches from cast-on. Then work 12 rows of k1, p1 rib and bind off.

Sleeves
Place one sleeve’s stitches back on needles and rejoin MC yarn. Work back-and-forth or in the round. If you work back-and-forth, cast on one selvedge stitch at each side to use for seaming up later. Work 12 rows stockinette. In next row/round (RS), k1, ssk, work to 3 stitches before end, k2tog, k1. Work 11 more rows/rounds. Repeat these 12 rows/rounds 3 more times. Work 0 (4, 8) more rows/rounds stockinette. Sleeve should be 6 (6½, 7) inches from armpit. If it is not, continue in stockinette until it is. In next row/round, *k4, k2tog, repeat from * to end. Work 8 rows k1, p1 rib and bind off. Repeat with other sleeve.

Buttonhole bands
Pick up 3 stitches for every 4 rows along left front cardigan edge for button band. Work 8 rows k1, p1 rib and bind off. Pick up same number of stitches along right front cardigan edge. Work 3 rows k1, p1 rib. In next row, work eyelet buttonholes in the places you would like them (make an eyelet buttonhole by working up to the place you’d like the buttonhole, then YO, k2tog, and continue to the next spot you’d like a buttonhole). Work 4 more rows k1, p1 rib and bind off.

Finishing
Weave in ends, block, and sew on buttons!


Abbreviations used in this pattern:

k: knit
k2tog: knit two stitches together
p: purl
pm: place marker
rep from *: go back in this line of instructions to the *. Repeat the instructions from the * to the end of the line as many times as specified.
RS: right side (usually knit side)
ssk: slip the next two stitches as if to knit, then knit them together through the back loops.
st: stitches
WS: wrong side (usually purl side)
YO: yarn over (move yarn to front of needle as if to purl, but knit the next stitch, making a loop where the yarn went over the needle.


Copyright 2009 by Jennifer Little of Looking Glass Knits. Please do not sell this pattern or sweaters knit for it for your own profit.

Thursday, June 19, 2008

ahh... summer reading and knitting

The papers are all officially finished, graded, and taken care of! And I've dutifully started in on the reward yarn! (actually, to be totally honest, I may have started in on the reward yarn before I finished that last paper...) I'm happilly knitting away, while listening to The Age of Innocence on CD -- the first installment in the summer Comps-prep reading.


Though a chevron scarf is in the offing, I decided to start with a La Parisienne beret first, so that I could just knit until the yarn was through for the scarf. The two have very similar chevron designs. It's been a bit of a humbling experience for me, since I always think I know a better way to do something; I started out by using my go-to increase instead of the kf&b increase the pattern specified, because I thought it would look nicer. It is true that this kind of increase creates a clean, etched-looking line of stitches that matches very nicely the line created by the double decreases. However, all of that knitting into the row below was basically creating a line of EZ-style fake seams of slipped stitches that were much less vertically stretchy than the increases, and I had to rip out and start over again, following the directions as written.

It's also been a lesson in color theory. I chose these two colors because they looked good together in the skeins; they are pretty much the same value. Knitted up, the fact that they are the same value makes for a somewhat bright color combination, just on the edge of what I'd call garish, and not at all what I was expecting:

I think I like it though (and if not I'll gift it). The yarn I'm using -- Claudia handpainted and Koigu (the Gems sportweight was too big) -- doesn't stand up particularly well to frogging, which leads me to suspect that the finished product will not be very hard-wearing. I'm hoping that a scarf and a hat are not particularly hard-worn items.

The next knitting project in the hopper is to pop this baby on the swift:


That's one of a bag of Reynolds Candide, which I am going to use to knit my mom a Radcliffe Cardigan. It will be fun to follow my own directions like any other knitter, and see where they could be clearer. Candide is totally not the yarn I'd choose for my own sweater -- it's pretty darn scratchy -- but it promises to be very hard-wearing, and my mom is not bothered by itch. It is disappointing when your lovely hand-knit item starts to pill and stretch, as in fact happened to my own prototype Radcliffe (Swish DK? Not such a great yarn for adult sweaters). I am hoping that this Candide one lasts longer.

Hurray! Here's to summer knitting, finally here!

Sunday, January 27, 2008

Thrift, thrift, Horatio.

It's been quite the crafty weekend here at Looking Glass Knits, and also quite the weekend for trying new things. After yesterday's pleasant experience with the tubular cast-off, I was heartened to turn my attention to another finishing challenge that has been waiting around here for a while: the $5 sweater.


Lots of New York neighborhoods have cheapo clothing stores of one kind or another; the one in my neighborhood is called Pretty Girl, and it is full of a mix of cheap off-brand stuff and name-brand stuff that is damaged or otherwise offloaded by the makers. When I last visited Pretty Girl, I picked up a 100% wool sweater with a somewhat expensive label in a gorgeous color for $5.


Can you read that? It says "J. Jill," but it has been slashed through. The only problem was that it was too boxy for my taste. Hence the afternoon of knit-altering! I successfully sewed and cut my first steeks!

First I carefully ripped out the side seams. I was too lazy also to take out the sleeves, which fit me quite well, along with the shoulders and boob area. This took a bit longer than I thought it would because the wool was fine and pretty sticky (though these were good factors for the success of the rest of the project).


Then I hauled out the sewing machine and sewed a line of straight stitches about an inch and a half in from each edge.


Having been lazy about not taking out the sleeves, I curved my line out to the armpit and hoped I'd be able to fudge it into looking okay with my seaming.


Then I seamed up the sides by hand, just inside of this line. This part was identical to seaming a hand-knit sweater. It was a little wiggly in places, but I evened it out, and I was able to fudge the armpit area beautifully.

The finished seam is nearly invisible.


I cut the inside "hems" of the new seam, and the sticky yarn held the ends together so that this raw edge is very neat.


Significantly less boxy.


And the fit? Lovely. In fact perhaps a little too form-fitting, but a little steaming will even that out -- it's always easier to block something a little bigger than to try to shrink something, in my experience.


Yay for my first time steeking! It was easier than I thought it would be. This was a good project to try it out, because if it went horribly wrong, I didn't mind losing $5. But it didn't go horribly wrong, and now I am much more inclined to knit something steeked in the future!