It's baby sweaters all the time here! (It's turtles all the way down.) As soon as I finished that uber-cute sock yarn stranded sweater, I started in on another. I had ordered three skeins of that Essential Kettle "Grasshopper" yarn but only used two, so clearly the answer was to order another skein and try out a different patterned yoke sweater! Then I had a couple more brainstorms while knitting it, and all the sudden percolating in my mind is a genius idea for a step-by-step pattern that lets knitters work their way up to stranded knitting, and not one but three sweaters in the works. So if "Sock Yarn Stranded" is Star Wars Episode IV: A New Hope, these three sweater pattterns are Episodes I-III. Only without Jarjar Binks. And with better dialogue. Uh, and in sweater pattern form.
Anyway, lots of unnecessary baby sweater knitting going on here. I don't even know anybody who's pregnant this time! I suppose it's always nice to have a few presents sitting around waiting to be given, right?
Wednesday, July 29, 2009
More knitting is afoot.
Posted by
Jen
at
10:54 AM
1 comments
![]()
Labels: baby clothes, cardigan, original designs, sock yarn stranded, sweater, top-down, yoke
Saturday, July 25, 2009
Sock Yarn Stranded -- now with pattern!
Special note: from now until 2/14/10, I will donate 50% of the proceeds from all my pattern sales to the American Red Cross for Haiti relief efforts.
Here it finally is! I'm really pleased with this one. Not only is the finished sweater way cute, but I worked really hard and carefully on the pattern to make it easy to follow.
On Ravelry, I noticed that a lot of people who were using my baby sweater patterns seemed to be people who were using some of the techniques in them for the first time. Some of them expressed frustration, therefore, in trying to decode abbreviations or use techniques that I assumed they already knew. So I decided to write a pattern that would also teach people all the techniques involved in the pattern (within reason -- I don't give instructions for how to cast on or anything!). Indeed, this pattern will also teach knitters how to do all of the techniques involved in my other patterns.
So this pattern includes an extensive appendix, with photo-illustrated instructions for how to do my favorite M1 increase, how to ssk, how to work stranded knitting, how to pick up stitches for a buttonband, and how to seam with mattress stitch. It also includes a glossary of all abbreviations.

As for the pattern itself? It's also clearly and simply written, with lots of added instructions to walk people through stranded knitting and steeking (remember my fascination with this cool kind of steek!). It also uses sock yarn -- about a pair of socks' worth of the MC, and leftover scraps of self-striping yarn for the fair isle patterning. Sock yarn is great for baby clothes -- soft, machine-washable, a great gauge for making not-too-bulky garments, and made in a huge variety of colors and patterns. I ogled sock yarn for a long time before I ever made my first sock. I don't wear hand-knitted socks, but I am addicted to the yarn and love to find ways to use it!
Specs:
Size: 3-6 (6-9, 9-12) months
Finished Measurements: 20” (21”, 22”) chest, 10.5” (11.5”, 12”) long
Gauge: 7 st and 9 rows = 1 inch
Requirements: size 2 (3 mm) circular needles, 400-600 yards fingering weight sock yarn in main color (MC), plus leftovers (about 75 yards each) self-striping yarn in two colorways
I am charging for this one -- not a lot, $2.99 -- because I really did put a lot of work into it. I think it's well worth the cost. It's a Ravelry download -- I'm assuming that's an okay way of offering it, but comment if you can't access it. Click the "buy now" link at the top of this post if you want it!
But I am also offering just the appendix for free. Not only is it a useful tool for sort of intermediate-novice knitters, but it's also a way for me to preview the kind of instructions and care that are in the for-sale pattern. Here's the link:
download now
Yay for adorable baby-sweaterishness!
Posted by
Jen
at
11:52 PM
2
comments
![]()
Labels: baby clothes, cardigan, fair isle, original designs, ravelry, sock yarn stranded, steek, stranded, yoke
Friday, July 24, 2009
entrepreneurialishness
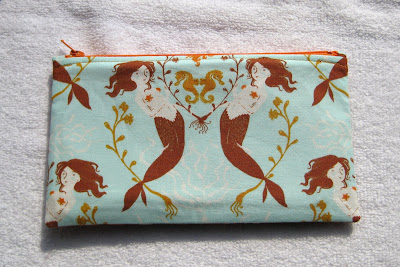
So anyone who's been following the blog the last month or so (and I know it has not been a particularly scintillating month of posts!) knows that I've been obsessively sewing zipper pouches of various sizes.
Not needing a gajillion zipper pouches just for myself, I've decided to open up a little etsy store. The bags I've made are all finished carefully and are perfect sizes for knitting on the go -- sock-size WIP bags and smaller notions pouches. Feel free to check it out!
Posted by
Jen
at
9:27 PM
0
comments
![]()
Friday, July 3, 2009
It's hip to be square!
Here's how I made my zipper pouch corners much squarer.
I ironed a hem on a little tiny piece of scrap fabric, then sewed this to both ends of my zipper. I used an iron-set glue stick to get the placement exactly right.
Here's a close-up, to show the seam and how close it is to the zipper stop. I used the zipper foot for this. I did a double seam for reinforcement -- just ran it in reverse along the same seam.
Here's what it looks like on the back side.
Now trim the zipper ends way back. This is about 1/8" away from the seam. Get them back to beyond where you know your seam will be when you're sewing the sides of the pouch.
Now you are only dealing with a piece of fabric when you turn your bag inside out and poke out the corners. A piece of fabric is, of course, much less stiff and much more flexible than the end of a zipper.
An added benefit: It sort of disguises slightly misaligned sides, because the little metal end pieces of the zipper are not right next to the corner to get pulled out of alignment, and because the added piece of fabric kind of blends out the colors of the two side panel pieces.
I am sure I'm not the first one to have thought of this. But it is cool!
Posted by
Jen
at
9:18 AM
1 comments
![]()
Labels: sewing
Thursday, July 2, 2009
Square corners!
It totally worked!
The trick was to sew a little piece of fabric to the zipper, running perpendicular to it, then to trim the zipper back to at least the middle of this piece of fabric, so that when sewing the seams of the bag the thread didn't actually run across zipper material at all. That meant that it was much easier to turn the corner, without that stiff plasticky zipper material in it.
I'll take some more process pictures tomorrow. It's way easy, but I mucked it up a little this time around. But the NEXT pouches...!
Posted by
Jen
at
3:37 PM
0
comments
![]()
Labels: sewing


