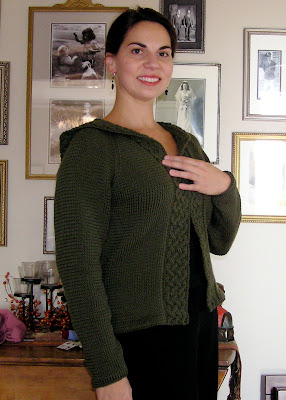
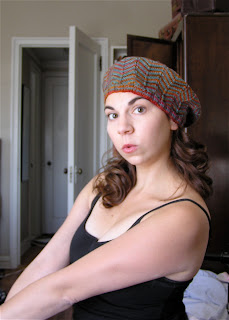
Monday, December 31, 2007

December wrap-up

Knitting has been abysmally minimal this month altogether, for a variety of reasons (mostly laziness and schoolwork). But I didn't want December to end without at least one more post. Therefore, I present:

Progress on mystery sweater sleeve

Late start on holiday gift-knitting: endpaper mitts for my graduate student friend with a cold apartment and lots of papers to type

Another baby sweater for Andrew, using the yarn I frogged from the ill-fated car intarsia sweater. This is quite a bit more boring and conventional, but more useful and less problematic to knit.

Happy New Year, everyone, and good luck with all your knitting projects! I am looking forward to a month off from grad school -- a month I intend to fill with much more knitting.

Saturday, December 15, 2007

December tidbit

December has been a slow knitting month, so I've been terrible about posting. Here is the only real progress I've made this month:

the sleeve of the secret sweater


blasted interminable fair isle yoke sweater. I'm making progress on this one by sheer discipline: it's the only piece I'll allow myself to put in the knitting bag when I leave the apartment, so that I can't work on anything else.

It is slow going: each row of the fair-isle yoke sweater takes me about 20 minutes (that's basically one trip on the A train to midtown). But also, here is what my normal knitting spot looks like these days:


I'm working on three different medieval lit papers. Stupid edjumacation getting in the way of my knitting time...

Saturday, November 17, 2007

Progress is slow... because I keep starting new things...


The fair isle yoke sweater is chugging slowly along, like an A train on weekends. In fact, the above photo represents quite a bit of work -- the body is now down to the waist and only needs about seven more inches, I think. Knitting stockinette at a gauge of 9 st/in is kind of mind-numbing.

Therefore, I've been alternating it with a few other projects. Two of them are sort of secret though, so I'll give you snippets:

fancy fair isle awesomeness


underexposed cable awesomeness


Finally, here is a hat.
This was an afternoon break, Andrew-B-and-his-amazingly-round-baby-head-are-visiting project.

Thursday, November 1, 2007

It's a Halloween Miracle!


I only had enough yarn for the neck ribbing and part of one armhole, but somehow... the yarn lasted for eight vests and eight socks!

... no, seriously, I ran out of yarn halfway through an armhole ribbing, and I had to unravel the vest (which was already on the short side) from the bottom and reknit it shorter to conserve yarn. But -- through the miracle of blocking, I was able to stretch this baby to be more than long enough!

I guess my pumpkin patch was the most sincere one this year...


How's that for a sweater girl pose? The Hermione costume was a hit. Here's a photo of the whole thing, with the cape and wand (recognize it? It's a bamboo knitting needle -- size 8 clover, to be exact).


By the way: knee socks? So comfortable. Why can't adults wear them? I got a lot of weird looks for them walking down the street yesterday (and a few leers, which, eew).

Sunday, October 28, 2007

Perfect Paula -- the original and the copy

In a few comments, some of you wondered what the original vintage sweater on which I based Perfect Paula's cardigan looked like. The original, which was bought probably 30 years ago or more, is this tan one:


Below is the copy. You can see that I changed some of the cable patterns, making one snake cable into a honeycomb, and the leaves into diamond and bobbles. The original is more cropped and is blocked out a lot more so that it has a boxier shape, but in fact the measurements are pretty much the same, aside from longer armholes at the request of Paula:


Now that it's getting colder, it's fun to take lovely sweaters out of storage and look forward to wearing them!

Sunday, October 21, 2007

Mr. Pottah!


Imagine that title being spoken in a sinister (yet sexy) British accent.

Iteration 2 of my Gryffindor vest is on the needles and has taken priority over other knitting in the weeks before Halloween. Knitting worsted weight wool with circular needles is so fast, man! I worked for a few hours on this , and I'm already a few inches from the armholes.

After this vest is done, I must force myself to return to the fair isle yoke sweater. All of that fingering-weight stockinette... but I want to wear it! I have to keep reminding myself of that fact!

Friday, October 19, 2007

Happy Halloween!


Just in time for Halloween, here's a pattern for you (I've been sitting on it for quite a while, but the publication I sent it to didn't pick it up):

Dante Alighieri is famous for writing the Divine Comedy, the story of his trip to Hell, Purgatory, and Heaven, but he’s just as well known for his iconic headgear: every picture of Dante ever painted depicts him in a droopy medieval “sack hat” worn over a white skullcap with earflaps whose cords he lets dangle in a devil-may-care (pun intended!) attitude. Sometimes Dante is also shown with a poet’s laurel wreath atop this hat.

Since I couldn’t find a Dante hat for sale on a recent trip to Florence, I decided to make one of my own, complete with intarsia laurel wreath and dangling earflaps. Real medieval sack hats were just tubes of fabric drawn together at the end, but I gave mine a little shaping at the top so that it would lie the right way and not fall down over the eyes. Since the stranding and the addition of earflaps already added some bulk, I opted for attached i-cord ridges to imitate a folded-up brim without the doubled fabric weight. The result is, I think, not just a delightful costume element but also an attractive hat for everyday wear.


SIZE
S [M, L] (shown in size S; sizes are extremely customizable). Size S fits teenage children and small-headed women; size M fits large-headed women and small-headed men; size L fits large-headed men.

FINISHED MEASUREMENTS
Circumference: 18 [20, 22] inches
Length: 11.25 inches

MATERIALS
Karabella Aurora 8 [100% merino wool; 98 yd/90 m per 50g skein];
[MC] #7223: Burgundy; 2 [2, 2] skeins
[A] #7767: Sage; 1 [1,1] skein
[B] #1364; Oatmeal; 1 [1,1]

1 set US #8/5 mm double-point needles
1 set US #8/5 mm straight needles (optional)
16 inch-length US #8/5 mm circular needle
24 inch-length US #8/5 mm circular needle

Stitch markers
Tapestry needle

GAUGE
16 sts/26 rows = 4" in stockinette stitch

PATTERN NOTES
Attached i-cord: tutorial can be found here.
Provisional cast-on: tutorial can be found here.
Three-needle bind-off: tutorial can be found here.
Sl1-k2tog-psso: slip one stitch, knit the next two stitches together, and pass slipped stitch over this stitch.

PATTERN Band
In MC, CO 17 st using provisional cast-on.
Row 1: k8, join yarn A and k1 with A, k8.

Laurel wreath pattern, first half:
In stockinette stitch, work the setup rows for the laurel wreath, following the chart. For size S, work 3.5 repeats of chart (there should be four leaves on each side of the wreath). For sizes M and L, work four full repeats of the chart (there should be four leaves on one side of the wreath and five on the other side). Finish laurel wreath with the appropriate branch tip, depending on which side of the wreath your final leaf is on.

Continue in stockinette stitch in MC for 5-10 more rows. This is where you can customize the size of your hat: work a few rows past laurel wreath pattern, then hold band up to your head or the head of the person for whom the hat is intended, stretching it somewhat for a close fit. When band seems to reach halfway around your head, count the number of rows past the laurel pattern, knit this same number of rows, and move on to the second half of the laurel wreath:

Laurel wreath pattern, second half:
Turn laurel wreath chart upside down. Join yarn A again and knit exactly the same wreath as the first half (including your appropriate branch tip), only going from leaf tips to stems, to create a mirror image of the first half.

Leave live stitches on your needle and pick CO stitches from provisional CO with another needle. With a third needle, BO beginning and end stitches with 3-needle bind-off, making sure the middle “stem” stitch of laurel wreath is lined up on each side.

With MC and 24-inch circular needle, pick up 3 stitches in every 4 rows along one (long) side of your band. Work applied i-cord along these stitches. Repeat with the other side of the band. Use dangling yarn ends to weave together the ends of the i-cord at the seam of the band.

Hat body
With MC and 16-inch circular needle, starting at the seam, pick up the same number of stitches along one side of band. Place a marker (pm) at the first stitch.
Round 1: k half of the stitches, pm, work to end of round.
Round 2: k to 22st before middle marker, k2tog, pm, k to 7 st before middle marker, k2tog, pm, k to middle marker, remove marker, k5, pm, ssk, k14, pm, ssk, work to end of round.
Round 3: k, slipping markers.
Round 4: k to 2 st before first marker, k2tog, sl marker, k to 2 st before second marker, kttog, sl marker, k to third marker, sl marker, ssk, k to fourth marker, ssk, work to end of round.
Repeat previous two rounds three more times.
Round 11: k to end of round, removing all markers but the one at the seam.
Knit 12 more rounds.
Before starting round 23, count your stitches. The final shaping requires a multiple of seven stitches. If you don’t have a multiple of seven, use the next round to decrease by the remainder, spacing your decreases evenly around the round (for example, if I had 73 stitches, I would decrease by three stitches now).
Round 24: divide your stitches into seven equal increments. *Knit one increment, pm, repeat from * to end of round.
Round 25 and subsequent odd rows: *k to 2 st before marker, k2tog, sl marker, repeat from *.
Round 26 and subsequent even rows: k, slipping markers.
When there are only 2 stitches left between each marker, break yarn, leaving a 6-inch tail, and use a tapestry needle to draw yarn through remaining stitches. Pull needle through to WS, pull tight to draw up stitches, and knot yarn.

Earflaps
Put hat on your head and use your finger or a pin to mark a spot about an inch behind your right ear. Using yarn C, start at this point at the seam where you picked up stitches for your bottom edge i-cord, and pick up 19 stitches, working toward the front of the hat.
Row 1 (WS): k1, p1, k1, pm, p13, pm, k1, p1, k1.
Row 2: k1, p1, k1, slip marker, k13, slip marker, k1, p1, k1.
Work three more rows as established, with seed stitch at edges and stockinette between markers.
Row 6: work seed st to marker, slip marker, k2tog, work stockinette to marker, k2tog, slip marker, work seed st to end.
Row 7: work seed stitch to marker, slip marker, work stockinette to marker, work seed st to end.
Repeat these two rows until five stitches remain.
Next row (RS): k1, s1-k2tog-psso, k1.
Next row: begin making i-cord with these three stitches. Make i-cord for about 7 inches, or until long enough to tie under chin.

Repeat this process on the other side of the hat for the left ear.

FINISHING
Weave in ends. The hat must be carefully wet-blocked to make sure that the brim does not curl up and the i-cord is all lying evenly.


The Recipient looking very much like the D-Man himself!

Sunday, October 14, 2007

A visit with Andrew E. H. B.


The esteemed Mr. Andrew E. H. B. paid me a visit today, and of course I had to get him to model some clothes. First, the baby sheep sweater, which is not for Andrew (he already has one) but looks awful cute on him:

Then his Halloween costume, which is a dinosaur hood from Moth Heaven:

It was hard to get him to hold still and not look at the camera while I got a profile shot (he already knows how to model, the little diva...):

Sheep Yoke Baby Cardigan Pattern

3/29/08 note: this pattern is also available as a free PDF from Ravelry. Click here to download it if you'd rather have it in that format!

4/8/10: cliquez ici pour la version française de ce patron (PDF), traduit par Louise Robert pour Biscotte & Cie.


Here is the pattern for my sheep-yoke baby cardigan, which was inspired by a sweater "recipe" in Gibson-Roberts and Robson's Knitting in the Old Way. My version has a much simplified yoke pattern and is sized for a baby.


Sheep Yoke Baby Cardigan

General pattern note: as with my other patterns, I have given directions for two sizes using different size needles. Doing so means that the stitch counts and fair isle patterns can stay the same across sweater sizes. Make sure you choose the size needle that will give you the proper gauge! Since babies grow so fast, however, it's really not particularly important to make a sweater in an exact size.

Size: 6-9 months or 9-12 months
Yarn: DK weight superwash wool (I used Knitpicks Swish DK) in tan (220-250 yards); blue, green and cream (60-90 yards); black (less than 20 yards); for girl's version, pink (less than 60 yards).
Needles: size 5 (smaller size), size 6 (larger size) straigh or circular needles.
Gauge: 6 stitches and 9 rows = 1 inch (smaller needles); 5.5 stitches and 8 rows = 1 inch (larger needles)
Shown in size 9-12 months.


With tan yarn (MC), CO 70 stitches. Work 7 rows of k2, p2 rib. Work 1 row of purl. Break yarn and join blue.

Begin working Sheep Yoke Chart. The row marked "setup row" is the purl row you have just worked. Chart guidelines:

  • Be sure to repeat each bracketed section four times as you work across the rows, and be sure also to space increases across each section without lining them up vertically -- lining increases up along the red "fault lines" of the pattern will result in ugly and obvious increase "seams." You can pretty much put the increases wherever you want in each section -- some knitters have complained that they have to do math to get the increases evenly spaced, but you don't have to -- if you just make sure that you work the right number of increases anywhere you feel like it in each section, they'll end up spaced pretty evenly across the yoke. Seriously!
  • The black wedges on the chart indicate "no stitches." Just jump across these areas to the next stitch in the row.
  • Only work the pink flowers if you are making the girl's version. For the boy's version, just work these two rows in blue.
  • For the flower pattern ONLY, do not repeat each bracketed section exactly as pictured. Rather, keep the eight-stitch repeat of the flowers continuous across these two rows. You will also need to work in the required increases as you do so, so be careful!
  • For the rest of the chart, you can work the repeats exactly as pictured.
  • If you are making the boy's version, use blue yarn for the checkerboard pattern. If you are making the girl's version, use pink yarn. I have shown both on the chart for a visual aid.
After you have completed row 34 of the chart (206 st), divide for the sleeves as follows:
K29, place 44 st. on a holder or piece of scrap yarn, k60, place 44 st. on a holder or piece of scrap yarn, k29.

Work straight in stockinette with MC until piece measures 10.5" [12.5"]. Then, work 2 rows with blue (boy's version) or pink (girl's version). Work one more row with MC, then work 7 rows k2, p2 rib and BO.

With black yarn, duplicate-stitch heads and legs to sheep as charted in the Duplicate Stitch Chart (sheep should be facing toward the button band on each side). Use blue yarn to make french-knot eyes for the forward-facing sheep in the center back.


Return stitches from one arm to needles and join MC. Work 9 rows stockinette. In the next row, decrease by one stitch at each edge. Repeat these ten rows two more times (38 st). Work 7 more rows, then join pink or blue and work two rows with this color, then work 1 more row with MC. Work 7 rows k2, p2 rib and BO. Repeat with other arm.

With MC, pick up 3 stitches for every 4 rows along the right front edge. Work 8 rows k2, p2 rib and BO. Check out your button band and decide how many buttons you would like and where you would like to put them. Pick up the same number of stitches along the left front edge. Work 3 rows k2, p2 rib, then work a row of buttonholes as follows: work 4 stitches in rib, *YO, k2tog, work in rib to place you'd like the next buttonhole, rep. from * until 6 stitches from end, k2tog, YO, work 4 stitches in rib. Work 4 more rows of k2, p2 rib and BO.

Seam arms, weave in ends, and block. Sew buttons to button band to match buttonholes.

Notes and suggestions for modifying:
  • I stranded my sheep, but you may find it easier to use intarsia.
  • If you are averse to knitting it flat, you can certainly feel free to knit in the round and steek. If you’re using superwash wool, the best way to reinforce would be with a sewing machine.
  • If you are a little nervous about the garter stitch sheep, there is no reason why you could not knit them in stockinette. This will only affect the texture detail. If you want to try other ways of adding texture, you could try bouclé yarn or something fuzzy like angora. If you wanted lots of texture, you could add some bobbles! I’ve also fantasized about making one – or all – of the sheep black (doesn’t every flock need a black sheep?


It's finished!! I am totally pleased with everything about this sweater -- the yarn is nice and soft (and the right colors now), the pattern was modified to be as easy as possible, and there are no seams at all!

Stay tuned for the pattern.

Saturday, September 29, 2007

the sheep emerge to graze


It's amazing how little knitting gets done when all one's time is consumed with reading! Nevertheless I have set aside just a few hours to knit and have finished the yoke on my recreated baby sheep sweater. This time I am taking better notes so that I can post the pattern; I hope to have it up soon.

It took me a while to figure out what I wanted to do to give the sheep some texture. In the original sweater the sheep were knitted with a strand of laceweight mohair carried along; this did not give as much halo as I had hoped. Then I tried a boucle yarn, but the gauge was really too big. So then I hit on using the same gauge of white yarn as the rest of the yoke, but knitted in garter stitch. I think that this was the way to go. When doing the math, then for the yoke sheep, I spent some time considering what to do to make the sheep symmetrical, and, not wanting butt-to-butt sheep in the center back, I hit on this idea:


Why can't one sheep face forward? I did some blue french-knot eyes just to make it clear that that's what's going on. I like his little face.

Saturday, September 22, 2007

tales of hubris punished and patience rewarded

Here is what is on the docket for this weekend:

Hali Meidhad and Seinte Margarete, a few Canterbury Tales, a meditation on the Passion by Nicholas Love, and some NPR knitting.

You may notice that there is a totally new work in progress there on the trusty natural light windowsill. It's true -- I have become an incorrigible starter.

But in this case, there is a tiny bit of an excuse. I made a shocking discovery earlier this week after looking closer at the car intarsia sweater I was making. The process of switching from flat knitting to in-the round knitting I had done in order to do the intarsia part flat had made a significant difference in the shape of the stitches I was making -- and not just a difference in gauge. Witness exhibit A:

In the top half you can see my even in-the round stitches. In the bottom half are a bunch of squiggly, twisted flat stitches. It was at this point that I began to question the arrogance of my claim to be an expert knitter and precocious autodidact. I began to suspect that something was wrong. I flipped open a knitting basics book that had been mouldering on my shelf and made the shocking discovery that for five years I have been purling wrong -- bringing the working yarn around the needles in the opposite direction from the normal one, twisting all my stitches as I did so. It felt akin to being friends with someone for a number of years, only to discover that you have been calling him the wrong name that whole time. So I chucked the offending sweater into a corner for a while in a clear case of killing the messenger, and set myself to knitting a new sweater and purling the right way. Exhibit B:


I have two other excuses. The first is the discovery that another friend is pregnant, thus clearly necessitating a brand new baby sweater. This one is another crack at the top-down baby sheep sweater like the one I made for Andrew. This time I am keeping better track of the process so I can write it up and post the pattern. The yarn is Knitpicks Swish DK, but the blue and green yarns arrived quite a bit more neon than I had wanted -- as is often the case with Knitpicks yarn. So, having been emboldened by my Bristow experience, I popped the two skeins in a bath of water with half a packet of grape kool-aid, and fixed it! I think that the result is quite nice. The mottling of the dye gives the blue yarn a nice homemade look, as opposed to the mediocre acrylic baby boy sweater color it was before, and the green is a more subtle and organic hue too. I'm working out the sheep charts right now: I'm thinking garter stitch for some texture detail.

The second reason to start a new project is a newfound desire to perfect some patterns and post them, because...

My Ravelry invitation finally came!


Ravelry is great! Definitely not a replacement for blogging, and I do rankle at the restrictive nature of the program as it exists now (not sure how to add new patterns, can't register myself as a designer, can only use books already on the site in my library, etc), but it has been fun and exciting to snoop around, and I love the "favorites" feature and the feature that lets me look at what other people are doing with the yarns and patterns I have chosen. If you're on Ravelry too, my ID is lookingglass.

Sunday, September 16, 2007

Works in Progress

Now that the top-down Arwen has been shipped off to its recipient, here's what's been cooking Chez Looking Glass in the last few weeks.

First things first, I have been doing a LOT of reading, of medieval lit, criticism of medieval lit, and more medieval lit. Three classes in medieval English literature, plus picking up a colleague's Canterbury Tales class while he's out sick, has led to a veritable onslaught of Middle English. I suppose it won't be long until I am blogging like this guy.

The fair isle yoke sweater continues to progress, having been divided for the sleeves. At a gauge of about ten rows an inch, however, it is moving along mighty slowly. To stave off boredom I have cast on for a number of other projects as well:

My Halloween costume: yes, this is the beginning of a Gryffindor vest. I'm knitting it in Ella Rae Classic Wool, which is certainly on the scratchy side but still very pleasant to work with and a steal at something like $4.50 a 200+ meter skein.

A pseudo-secret project. In Knitpicks Swish DK, which has been good in an economizing way. It has stood up to some ripping-out, which bodes well for its wearability, I think.

Another sweater for baby Andrew, also in Swish, in one of their lovely new heather colors. Question about this one for you loyal readers, though, if you can eyeball from the arm buds and neck size what the finished sweater's size will be: is the car just too small? It is proportional to the buttons I used for the wheels, but in proportion to the rest of the sweater it seems absurdly tiny. That could be hip, I guess, but it would depend on proper motif placement. Should I rip it out and make the car bigger, and give it intarsia instead of button wheels? Should I rip it way back and place the small car higher? Should I say, "this is a sweater for a one-year-old who will spill mashed peas on it the minute he puts it on, so stop your neurotic questioning and finish it"?

Saturday, September 8, 2007

Arwen!!

One trip to the zipper store later, and voila! My top-down Arwen in all its glory, all sewed up and ready to ship off to Boston to the sister. I think that she'll be able to get a lot of use from it: it's soft, stretchy, and practical, and the zipper definitely gives it structure.


Sewing a zipper on the inside of the placket definitely takes some of the awesomeness away from the reversible cable, but it's rather innocuous, and the custom-chosen color is a definite match.


Now I am finally DONE with this one and can move on to something more exciting -- like row after row of tiny-gauge stockinette in my post-yoke fair isle...

Thursday, September 6, 2007

Frustrations

The good news is that the top-down Arwen is completely knitted and blocked, and looking good, if I do say so myself.


The bad news is that I have somehow lost the custom-color-and-length zipper I had chosen for it from a special custom zipper store downtown. It's not a huge deal; the zipper cost me only like $2.75 and about 20 minutes of matching colors, but it's frustrating because I had reserved this afternoon to sew in the zipper and be finished with this puppy!


These photos show the value of the nonexistent zipper: I had to hold the fronts closed for the photo shoot because they are wont to curl outward along the same curve as the one the hood makes as it flips over the shoulders. Also evident is the fact that without a zipper to anchor the fronts, it's pretty easy for them to get slightly off-kilter from one another and make one side look shorter. It's not.

The hood from the back looks quite nice. I waffled for quite a while on the sleeve cuffs, between finishing them with another cable or with a folded-in hem. In the end I went for the hem, partly to make life easier for myself with no grafting of live stitches to side selvedge, and partly to avoid cutesiness that might arise from too much matching cable. I didn't want to distract from the lovely focal point of the sweater.

I am hoping that this sweater fits my sister a little better than me. She tried it on numerous times before I divided for the yoke, and the sleeves seemed to be the right size for her. On me they seem a little too wide at the top. She is also a little slimmer and longer altogether in the torso and has much smaller hips, for which I planned when executing the shaping. I am hoping that the little wrinkles along the back from being hiked up on my butt will not appear when Sarah wears the sweater.

Tomorrow after class I will run out and get another zipper, I guess -- the zipper store is only about 6 blocks from my grad school, so it won't be a herculean effort. And of course, the moment I sew in the new one I will find the old one...